Table of Contents
Making slow-motion effects smooth has been trending on social media reels lately. Creators often use slow motion to make their videos aesthetically pleasing and enjoyable to watch.
But achieving smooth, slow motion can be difficult without the proper tools. In many cases, slowing down video makes it choppy. CapCut PC’s Optical Flow feature makes slow-motion smoother by inserting additional frames between the original ones.
Remember, CapCut PC features many awesome options, but some professional features like Optical Flow can cost money to access.
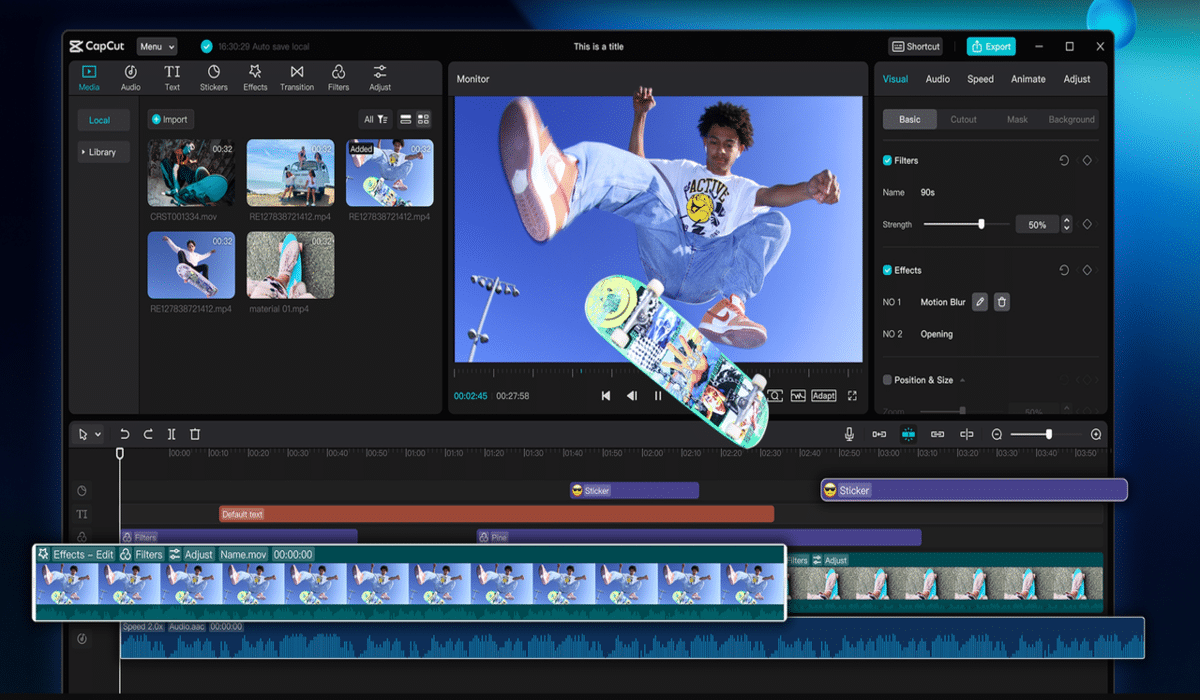
Why Use Optical Flow for Slow-Motion in Reels?
Optical Flow is an intelligent method to produce smooth, slow-motion video. Unlike simple frame duplication, which only replicates frames to create gaps, Optical Flow observes each segment of the video as it moves.
It then constructs new frames according to this motion. This renders slow-motion smoother and less jerky. Smooth, slow-motion is critical because it holds people’s attention and makes your reels professional-looking.
Slow-motion that is choppy will distract the audience and diminish the quality of your content. Optical Flow helps avoid choppy playback and ghosting effects in slow-motion footage.
It also maintains the video sharp and clear, retaining the details. This helps your content look polished and more shareable across platforms.
A lot of creators blend slow-motion effects with text to speech to include clear narration or commentary to enhance telling a good story and keeping the audience engaged. Note that Optical Flow is a feature of the advanced version of CapCut PC and might not be there in the free version.
Step-by-Step Guide to Creating Smooth Slow-Motion Effects on CapCut PC
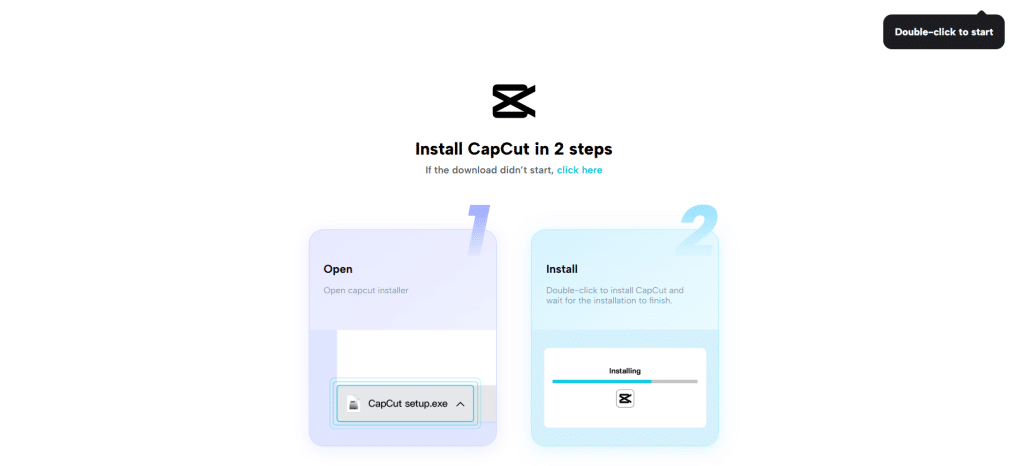
Step 1: Download and Install CapCut PC Desktop Video Editor
First, visit the official CapCut website and download the CapCut PC Desktop Video Editor. Ensure that you download it from the official website only to keep your device safe and receive updates timely.
Ensure that your computer is compatible with the system requirements before you install it. Once you have downloaded, launch the setup file and install the software following the instructions.
CapCut PC also has advanced tools, such as AI video generator software, which you can use to produce additional video content from the script in addition to your slow-motion footage.
Step 2: Import Your Video Clip
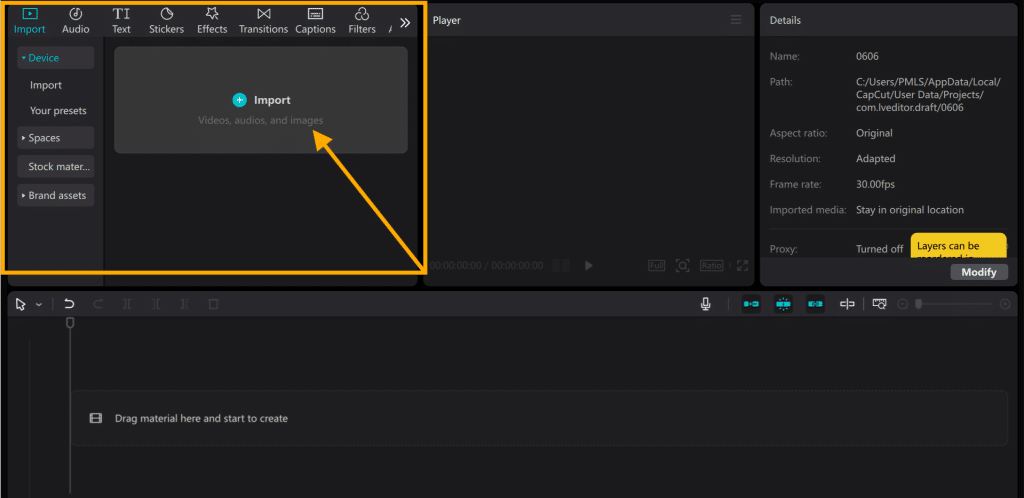
Open the CapCut PC Desktop Video Editor. Hit the “Import” button on the top left of the screen. Locate and import the video you desire to edit from your files.
To achieve the best slow-motion effect, utilize videos with a high frame rate, e.g., 60 frames per second or higher. After importing, drag the video onto the timeline at the bottom of the interface.
Step 3: Apply Slow-Motion Effect
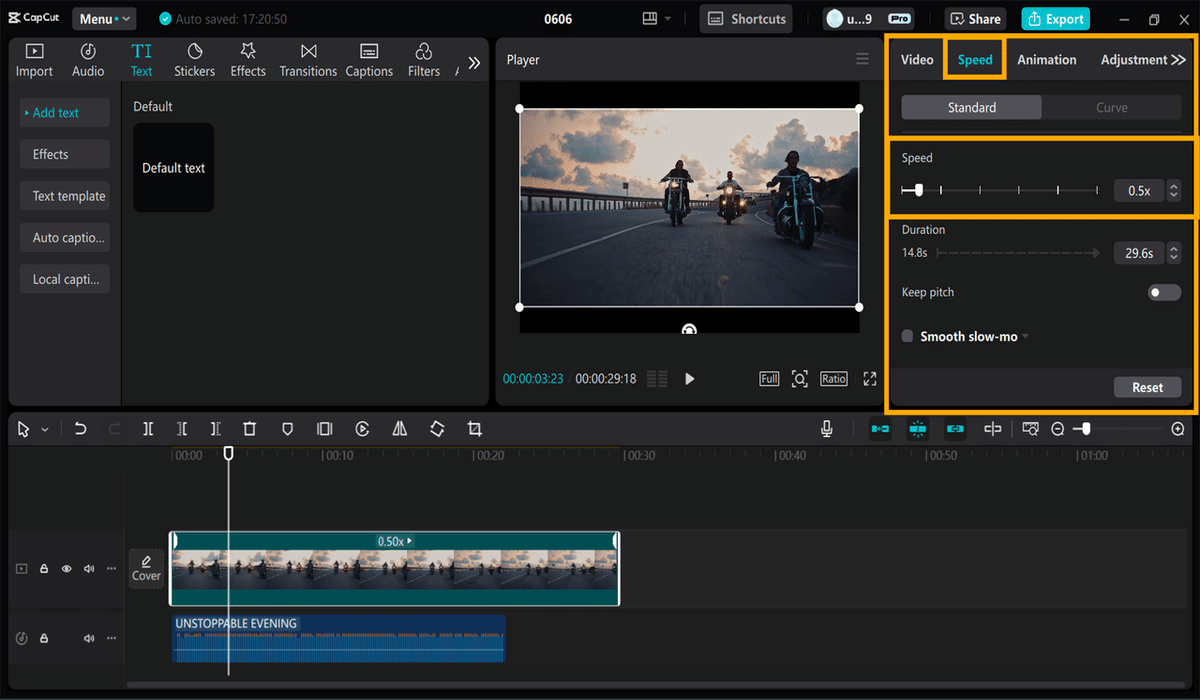
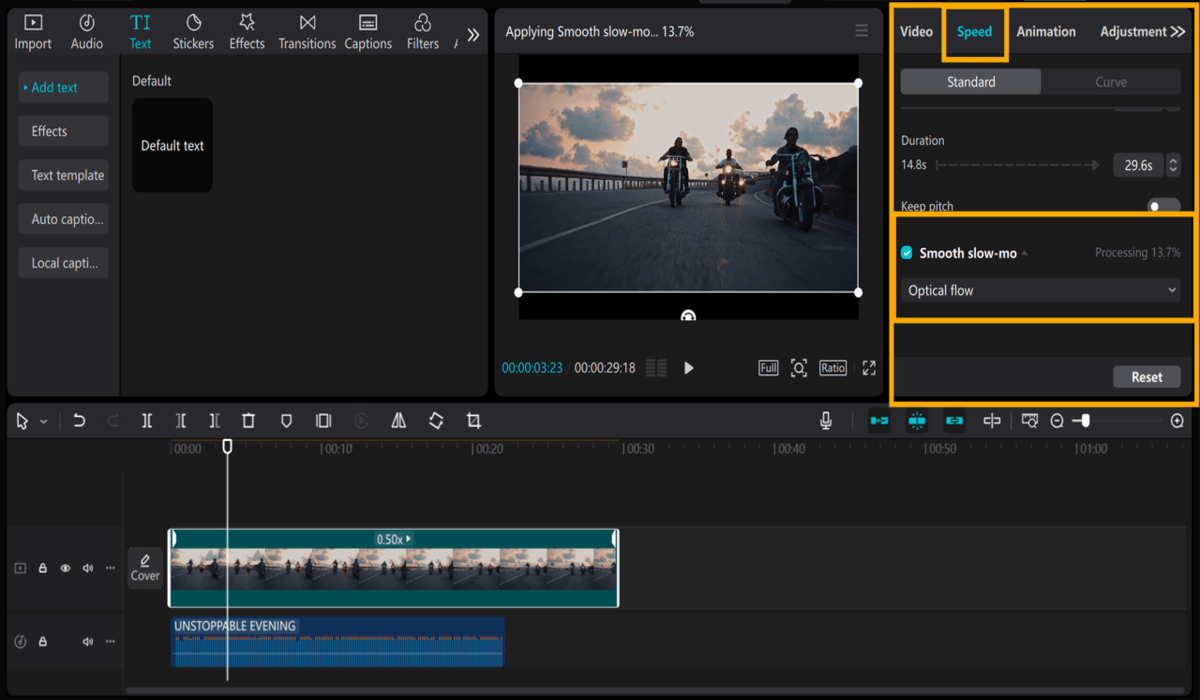
Select the video clip in the timeline by clicking on the video clip. Next, click the “Speed” button just above the timeline. You should notice a slider or speed options.
Move the slider to the left to slow down the video or enter a slower speed, such as 0.5x. This will play your clip at half the speed it was originally recorded. You can modify this speed to what you prefer, but slower speeds are best with Optical Flow.
Step 4: Turn on optical flow for smooth slow motion
After setting the speed, find “Smooth slow-mo” near the speed controls. Click it. Select “Optical flow.” This adds extra frames between the originals.
The result is smoother, more natural motion. CapCut PC will begin to process your video, which can take a while depending on the video’s length and your computer’s speed.
Remember, “Optical flow” is a pro feature and may need an upgrade to a paid plan to access it. If your computer is slow or the clip is a long one, try cutting down the video to make it quicker to process.
Step 5: Preview and Fine-Tune
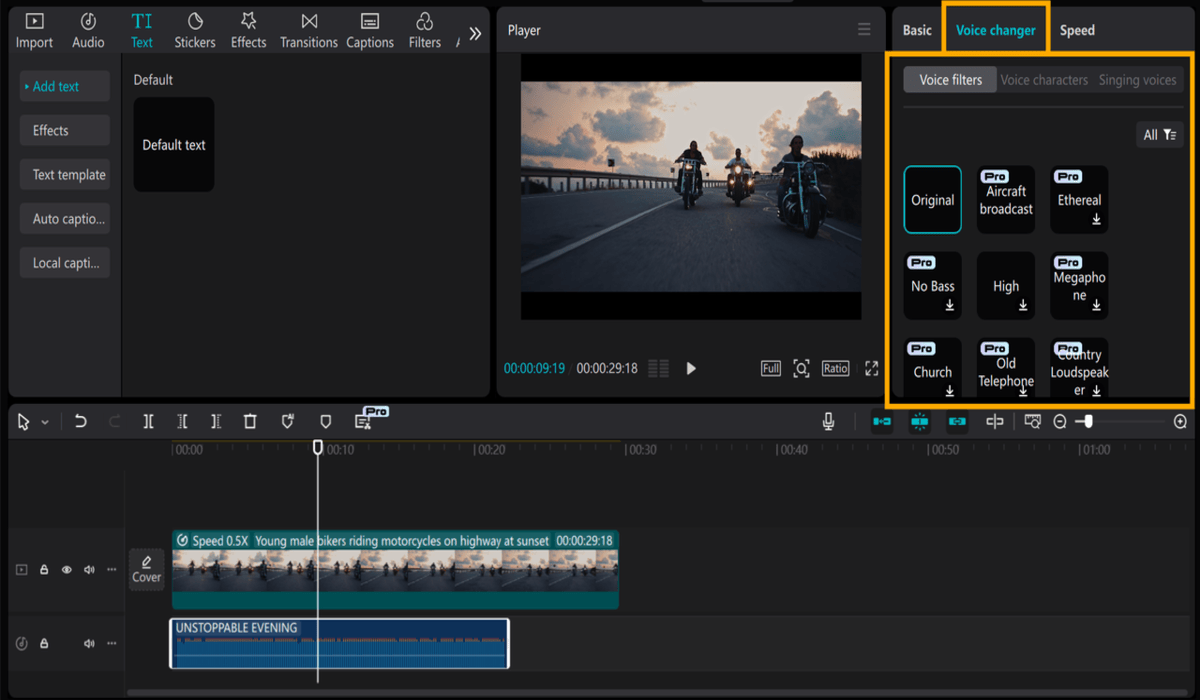
After processing, play the video to experience the seamless slow-motion effect. If the video is still a bit jerky, experiment with lowering the speed by a fraction or removing some portions of the clip. You can also improve your video by adding extra visual or audio effects.
For instance, some producers have a voice changer effect to make the audio more enjoyable or interesting, complementing the seamless visuals. Keep testing different edits and effects until the final result feels just right.
Step 6: Export and Share Your Reel
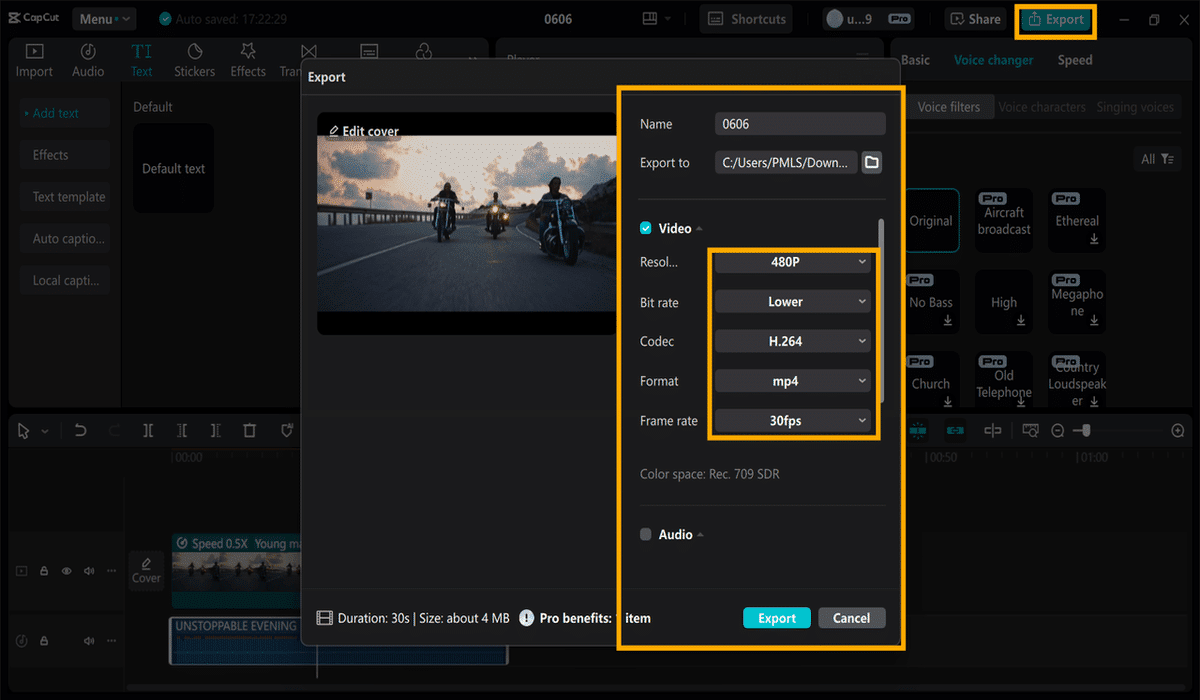
Once you’re done editing, press the “Export” button at the top right. Select the most suitable resolution and frame rate for social media reels, like 1080p at 30 or 60 frames per second.
Name your file and pick a folder on your computer where you want it saved. Once exported, your video is ready to post on Instagram, TikTok, or any other platform. Gliding slow-motion reels created with CapCut PC will be a hit and draw more viewers.
Conclusion
With CapCut PC’s Optical Flow feature, you can create smooth, high-quality slow-motion reels that look professional and fluid. This aspect makes your videos more professional by eliminating choppiness and maintaining details.
It provides your reels with a refined and striking appearance that can draw in more viewers. You can experiment with various speeds and clips to achieve the best effect on your style.
Keep in mind that CapCut PC also has a free version, but certain features, such as Optical Flow, can require a paid plan to access.
You should try CapCut PC Desktop Video Editor to stand out with your next video project. It is an awesome tool to make your creative visions a reality using smooth slo-mo, and much more to edit with.

